


This month we're taking a look at what it takes to glaze a real "show-stopping" piece, and we think we have a fool-proof formula! We use this method in our own production, saving both time and money... plus it gives amazing results!
Getting a complex, "drippy," result can be accomplished at home without a whole lot of brainpower and heartache. Some of the most successful glaze results can happen with only a couple glazes. That's right - only 2 glazes!
It's as simple as choosing a base glaze and an accent glaze!
 Crazed Copper base + Mottled Blue
STEP 1: Choose a "stable" base glaze.
By stable, we mean that it doesn't drip or have a tendency to run. They are often just a single colour that is unchanging, meaning it doesn't "break" or do anything fancy. Choosing a "celadon" is a safe bet.
 Photo 1: Forest by Laguna
Photo 2: Lavender by Amaco
Photo 3: Sedona Sunset by Coyote
STEP 2: Make your base glaze dip-able!
Yes, that means manually mixing up a bucket of dry glaze! We have a simple method for mixing dry glaze in our last blog post here, for anyone feeling intimidated.
Mixing up 5lbs dry is a good start. Dipping (instead of brushing) your glaze ensures you get an even base coat without running the risk of putting it on too heavy. It's also far more economical to do it this way because dry glaze is cheap - and you will need more glaze to cover a whole piece! Plus, dipping is just faster.
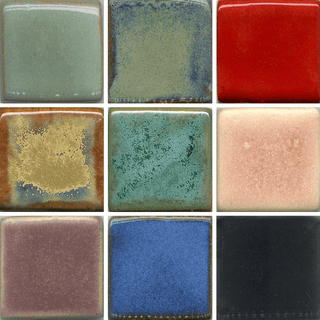
STEP 3: Choose a rebellious, wild, unpredictable pint of glaze!
AKA: the most fun step. Choose your accent glaze! These are the glazes you see that have a lot of stuff going on. They break into different colours, have a tendency to run, are often metallic or are apart of a glaze family that's a little bit unpredictable. They're like the wild child of the family, or your best friend who's a bad influence. These are the glazes that are going to add life to your piece! These are best purchased in pints, as you won't be needed a whole lot of them.

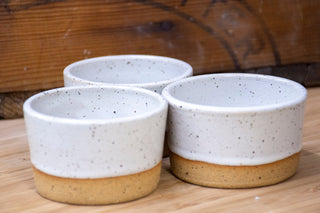
STEP 4: Apply to the top 1/3 of your peice.
Add your accent glaze to the top 1/3 of your piece. Works especially great on a bowl or mug because gravity is going to pull drips of glaze down to the bottom.
Using a fan brush, you can brush an entire layer of glaze right over the base glaze. As a general rule of thumb, we only add one coat of the accent glaze (so it doesn't run the risk of dripping off the piece and onto the kiln shelf). This will achieve a more uniform, but complex colour.

This was applied with a glaze bulb around the edge of the mug rim.
STEP 5 (Optional): Try a third accent
Because, why not? Just follow the same step as above - applying a little less glaze for each layer. We LOVE to use any of Coyote's line of Archie Glazes because they're formulated to run, drip and blend with any glaze they come into contact with. It's a great way to bond everything together.

Photo 1: Baby Blue Satin base + Ice Blue.
Photo 2: Starry Night base + Smokey Merlot + Fire Opal
Photo 3: Forest base + Gun Metal Green
The beauty of this method is that once you have a base glaze, all you have to worry about is buying pints of glaze here and there to get countless combinations!
Need some inspiration? Come by our studio anytime and we can help you pick out some great combos with lots of examples! Amaco also does an EXCELLENT job of cataloguing all thier glaze combinations.
Happy glazing, folks!
- Sarah